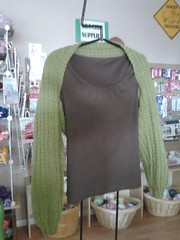
THE RIBBON YARN TANK
SIZE: Finished chest: 32” (34”, 36”, 38”)
MATERIALS: 5( 5,6,6) balls of aran weight yarn (100m ea)
5mm & 5.5mm needles or size required to achieve the tension.
GAUGE: 18 sts and 24 rows = 4” in st st on 5.5mm needles.
DIRECTIONS:
FRONT:
*With smaller needles, cast on 70 (74-78-82) sts.
Knit 5 rows, inc 4 (4-6-6) sts evenly across last row. 74 (78-84-88) sts.
Change to larger needles and beginning with a knit row, work in socking st (knit 1 row, purl 1 row) until work measures 11 ½” from the cast on edge, ending with the right side facing for the next row.
Armhole shaping: Cast off 5 sts at the beg of next 2 rows. 64 (68- 74- 78) sts.
Next row: K2, K1, Sl 1, PSSO, Knit to last 4 sts, K2tog, K2.
Next row: P2, P2tog, Purl to last 4 sts, P2tog through the back loops, P2.
Repeat the last 2 rows once more. 56 (60-66-70) sts.
Next row: K2 K1, Sl 1, PSSO, knit to last 4 sts, K2tog, K2.
Next row: Purl.
Repeat these last 2 rows 1 (2-3-3) times more. 52 (54-58-62) sts.*
Continue even in Stocking st until armhole measures 3 ½ (3 ¾- 4- 4 ¼) ins. ending with right side facing for next row.
Neck Shaping:
Next row: K17 (18-19-20). TURN. Leave remaining sts on a st holder.
Next row: P2, P2tog, Purl to end of row.
Next row: K to last 4 sts, K2tog, K2.
Rep last 2 rows once more. 13 (14-15-16) sts.
Next row: (WS) Purl
Next row: Knit to last 4 sts, K2tog, K2.
Repeat last 2 rows 3 times more. 9 (10-11-12) sts.
Beginning with a purl row, continue even in Stocking st until armhole measures 7 (7 ¼ -7 ½- 7 ¾) ins. ending with right side facing for next row. Cast off.
With right side of work facing, slip next 18 (18-20-22) sts onto a st holder. Join yarn to remaining sts and knit to the end of the row.
Next row: Purl to last 4 sts, P2tog through the back loops, P2.
Next row: K2, K1, Sl1, PSSO, Knit to the end of row.
Repeat last 2 rows once more. 13 (14-15-16) sts.
Next row: Purl
Next row: K2, K1, Sl1, PSSO, Knit to the end of the row.
Rep last 2 rows 3 times more. 9 (10-11-12) sts.
Beginning with a purl row, continue even in Stocking st until armhole measures 7 (7 ¼ -7 ½-
7 ¾ ) ins. Ending with right side facing for next row. Cast off.
BACK:
Work from * to * as for Front.
Continue even in Stocking st until armhole measures 4 rows less than the front (to shoulders.)
Shoulder and back neck shaping:
Next row: K10 (11-12-13) K2tog. Leave remaining sts on a st holder.
Next row: P2tog, Purl to end of row.
Next row: Knit to last 2 sts, K2tog.
Next row: Purl.
Cast off remaining 9 (10-11-12) sts.
With right side of work facing, slip the next 28 (28-30-32) sts onto a st holder. Join yarn to remaing sts and proceed: K1, Sl1, PSSO, knit to the end of the row.
Next row: Purl to the last 2 sts. P2tog through the back loops.
Next row: K1, Sl 1, PSSO, knit to the end of row.
Next row: Purl. Cast off remaining 9 (10-11-12) sts.
FINISHING:
Neck: Sew right shoulder seam. With right side of work facing and smaller needles, pick up and knit 22 sts down the left front neck edge. K18 (18-20-22) sts from front st holder. Pick up and knit 22 sts up right front neck edge and 3 sts down right back neck edge. K28 (28-30-32) sts from back st holder. Pick up and knit 3 sts up left beck neck edge. 96 (96-100-104 sts) knit 2 rows. Cast off in knit using a 5.5mm needle in your right hand.
Armbands: Sew left should and neckband seam. With right side of work facing and smaller needles, pick up and knit 64 (66-68-70) sts around armhole edge. Knit 2 rows. Cast off in knit. Sew side and armband seams.
Copyright 2007, WOOL-TYME Kingston, Anne Cormier Woodall


