24.11.08

KNITTED SATCHEL


SIZE: 7”x3”x10”
MATERIALS: - 3 balls (Approx 300 m chunky yarn)
- 5.mm needles 2 - 1” buttons
- 12”x12” piece of plastic canvas.
GAUGE : 17.5 sts = 4” in st st
DIRECTIONS:
Bag:
Cast on 33 sts
Knit 3 rows
Beginning with a knit row, work in st st (K 1 row, P 1 row) until work measures 23 inches from the beginning.
Continue in garter st (K every row) until garter st section measures 6 ½ inches.
Button hole row: K 5, cast off 3 sts, K to last 8 sts, cast off 3, K to end of row.
Next row: K across, casting on 3 sts above the cast off sts of the previous row.
K 1 more row. Cast off.

Strap: Cast on 13 sts. Work in st st for 10 inches.
Next row: Sl 1, K 1 PSSO, K9, K2tog. (9 sts) (NOTE: for wider band, continue on the original 13 sts)
Continue in Garter st until strap measures 30 inches from the beginning when lightly stretched.
Next row: (if working on 11 sts) K1, inc in next st, K to last 2 sts, inc in next st, K1. (13 sts)
Continue in st st for another 10 inches, making sure that the knit side is facing the same direction as the first side section of the strap.

Finishing: Fold st st part of the bag in half and place a marker at the halfway point on each side. Mark the center st of the cast on and cast off edges of strap.
Join the st st portion of the bag to the st st portions of the strap matching the markers.

Bottom: Cut 2 sections of plastic canvas 3”x7” (or to match the size of the bottom of the bag. Using nylon thread, stack the 2 pieces of plastic canvas on top of each other. Turn the bag inside out and sew the plastic canvas along the seams at the bottom of each side of the bag and along the bottom.
If desired, cut 2 more pieces of plastic canvas 3”x2” and sew on the upper sides of the bag on the inside just below the garter stitch strap section.
Sew buttons in position.

22.10.08

HONEYCOMB MITTENS


Adapted by Louise King.

Materials: 100g each of 2 colours of Manos del Uruguay wool or any other Worsted/Aran weight wool. The greater the colour contrast, the nicer the effect.
1 set of double pointed needles: size 3.25mm for large child’s mitt, (3.75mm for small lady’s), (4 mm for larger lady's ).

Directions:
With main colour which will be the outside of the honeycomb pattern cast on 42 sts and divide evenly onto 3 needles. Join in a round and work in K1 P1 rib for 3 inches. Increase 6 sts evenly on last round of rib. (48sts)
-Purl 2 rounds.

Honeycomb pattern:
Contrast colour: Round 1:*K4. SL2 purlwise. Repeat from * to end of round. Repeat Round 1 four times more. (5 rounds in total).
Main colour: Rounds 6 &7: Purl.
Contrast colour: Round 8: K1. *SL2 purlwise.K4. Repeat from * to end of round. Repeat Round 8 four times more. (5 rounds in total).
Main colour: Rounds 13 & 14: Purl.
Repeat rounds 1 to 13.

Thumb opening:
Main colour:
Next round: P2. Place 8 sts on holder for thumb. Cast on 8 sts over thumb opening. Purl to end of round.
Repeat rounds 1-14 three times more, then rounds 1-6 again.

Decrease:
Main colour:
1st round: *K4. K2tog. Repeat from * to end of round.
Knit 1 round after each decrease round.
3rd round: *K3, K2tog. Repeat from * to end of round.
5th round: *K2. K2tog. Repeat from * to end of round.
7th round: *K1. K2tog. Repeat from * to end of round.
9th round: *K2tog. Repeat from * to end of round. Cut yarn and draw through all the stitches left on the needles. Secure.

Thumb:
Contrast Colour: Knit across 8 sts from the st holder. Pick up and knit 8 sts from the cast on edge over thumb opening. Divide sts between the 3 needles and work in knit rounds until thumb is long enough.
Decrease row: *K2tog. Repeat from * to end of round. Cut yarn and draw through all the stitches left on the needles. Secure.

21.8.08

REVERSIBLE CABLE SCARF

The reality of cable knits is that they have a right side and a wrong side, making it difficult to use these beautiful knitting features in projects that need to be nice on both sides. This amazing technique eliminates the problem by incorporating a rib pattern into the cable, allowing the knit stitches to show nicely on both sides.

SIZE: 7” x 40” approx.
MATERIALS: 200 g worsted weight yarn (400m)
5mm needles

GAUGE: Tension is not important for this project.

ABBREVIATIONS:
RC8F: Reversible Cable 8 to the Front: Slip the next 4 sts onto a cable needle and hold to the front of your work. (K1, P1) twice. (K1, P1) twice from the cable needle.
RC8B: Reversible Cable 8 to the Back: Slip the next 4 sts onto a cable needle and hold at the back of your work. (K1, P1) twice. (K1, P1) twice from the cable needle.

DIRECTIONS:
Cast on 50 sts.
Rows 1, 2, 5, 6, 10: * K1, P1. Repeat from * across the row.
Rows 3, 4, 7, 8, 11, 12: *(P1, K1) 3 times, (K1, P1) 8 times. Repeat from * once more. (P1, K1) 3times.
Row 9: *(K1, P1) 3 times, RC8F, RC8B. Repeat from * once more. (K1, P1) 3 times.

Repeat rows 1 – 12 until desired length. Cast Off loosely in rib.

28.7.08

KNITTING SOCKS ON A SINGULAR CIRCULAR NEEDLE


This is not exactly a pattern but more a way to use your favourite sock pattern and turn it into a project that can be knit on a single circular needle.
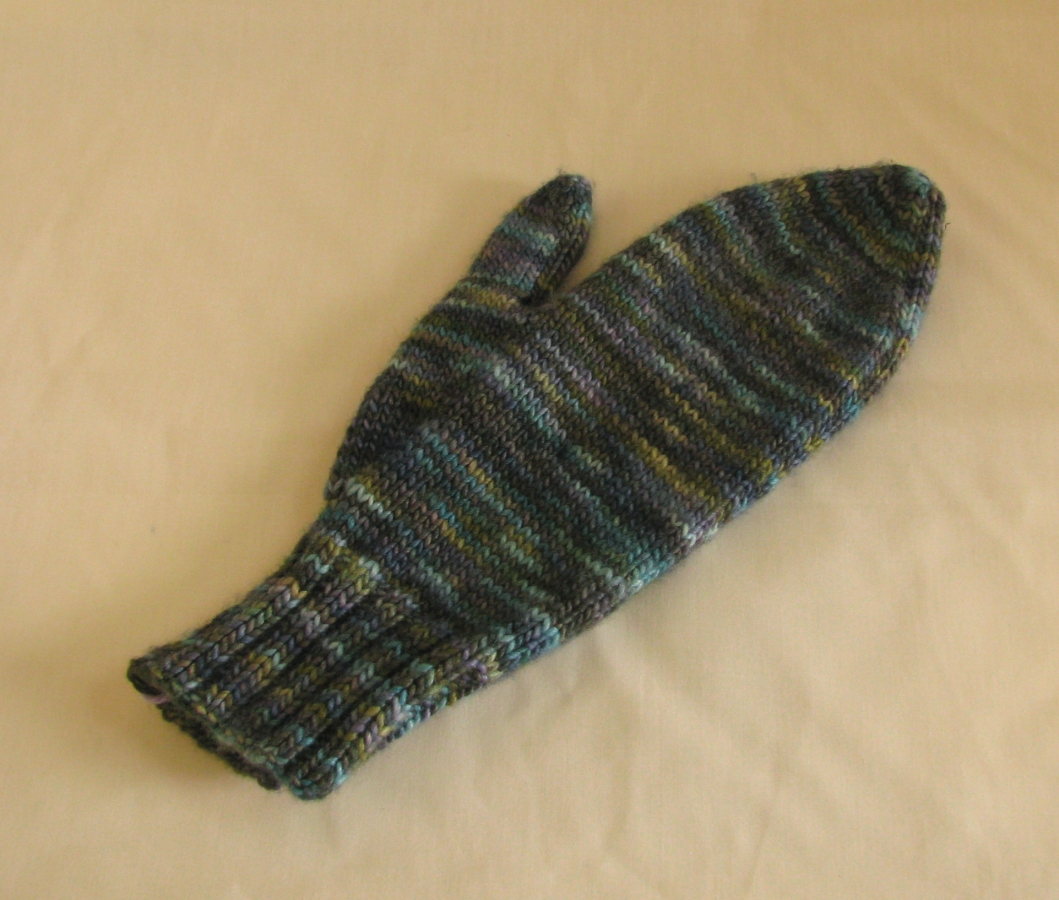
As you can see from the picture, it is a bit of an odd looking way of knitting socks, or any other project whose circumference is smaller than the length of your circular needle, but it's easy and with a little patience, you may be hooked on this method that never has you worrying about double pointed needles falling from your project.
To achieve the same results with this method there are probably many different ways to hold your needles, to get the stitches around the needle, to work your project to its successful completion, but this is the way that I find the easiest... Give it a try for the fun of it.
MATERIALS:
- A sock pattern,
-appropriate yarn for your pattern,
-circular needles at least 32" (80cm) long of the same size that the pattern calls for.
NOTE: I strongly recommend using Addi Turbo needles (lace or regular) or any other premium needles with soft, flexible wires.
-2 stitch markers of different colours.
Warning! As with any knitting project, it's usually the first 1% of the whole darn thing that is the hardest, so don't worry if you are having difficulty the first time you try this method. You can do it on a smaller number of stitches at first (at least 24) using chunky yarn and 5mm needles, just to get the hang of what's going on. And above all, do not use new circular needles with curly wires. Always straighten them out by using a warm hair dryer or by pouring very hot water over them and picking them up to dry and cool with a fork.

DIRECTIONS:
Casting on
-Using the circular needle cast on 1/2 the number of stitches that you require using the knit-on or cable cast on method.
-Place a marker to indicate the centre of the round of stitches (CM), and cast on the rest of the required number of stitches.
First Row:
-Slide all of the stitches so that they are all on the wire part of the needle and fold the wire at the CM.
-Gently pull the wire between the stitches at the CM and create a loop of wire with 1/2 of the stitches on one side of the wire and 1/2 on the other side of the wire.
-Slide the first 1/2 of the stitches (the part that has the cast-on tail) back on to a working end of the needle. If it makes it easier, you can tie a gentle knot using the cast on tail and the working yarn to hold this first row together making sure that the stitches are not twisted around the needle. (If it is against all of your principles of knitting to leave a knot in your work, you can tie a bow and undo it later when it's time to weave your ends in. )
-Slide the second 1/2 of the stitches (the ones that have the working yarn attached to them) as far on the wire as they will comfortably go without pulling the wire at the CM back into the work. (the CM is there for you to catch the wire and pull it back out should this happen.)
-Place a marker of a different colour at the end where the working yarn is to indicate the end of each round (EM).
-With the working needle full of stitches in your left hand and the driver needle without stitches in your right hand begin to knit as usual, creating a loop with the wire at the EM. (You may want to hold this wire out of your way with the thumb of your left hand.)
-Work across the first 1/2 of the stitches according to your pattern.
-Pull the wire loop at the EM so that the second 1/2 of the stitches are just at the base of the working end of the needle.
-Slide the stitches that have just been worked back on to the wire, emptying the right hand needle and place the CM on to the right hand needle, and work the 2nd set of stitches as usual, using your left thumb to keep the loop of wire out of your way.
(NOTE: When making the switch between the 2 sets of stitches, be careful not to pick up the yarn from under the driver needle, which will wrap it around creating a yarn over stitch, which will be as irritating as all get out!)
-When you reach the EM, line the 2 sets of stitches up side by side, to make double sure that they are not twisted around the needles.
The second row and beyond
-Slide the first set of stitches to the base of the empty needle and place it in your left hand.
-Slide the second set of stitches that have just been worked back on the wire emptying that needle for your right hand. Then slide the first set all the way on to the working needle in your left hand, in position to be knit.
-Place the EM on the right hand needle and work across this first set of stitches as usual to the CM.
-Slide the next set of stitches to be worked to the base of the working needle and slide the set that has just been knitted back on to the wire emptying the right hand needle.
-Then slide the stitches to be worked on to the working needle in your left hand and move the CM to the empty right hand needle. Work across this set of stitches as usual to the EM.
Repeat this "second row" method until the leg is the required length.
Heel
As the heel is usually worked on 1/2 of the stitches, the needles are already set up for you to begin as soon as you arrive at the EM.
Remove both markers and keep for later.
Working back and forth using both working ends of the needle on the first 1/2 of the stitches only, work the heel flap and turning of the heel according to your pattern directions.
Gusset
End the heel turning rows on a right side row.
-Drop the left hand needle.
-Holding the left side of the heel flap in your left hand and using the heel needle in you right hand, pick up and knit the required number of stitches.
-Slide the stitches from the sock that have not been part of the heel to the base of the left hand needle. Slide the stitches from the heel on to the wire and place the EM on the right hand needle.
-Work across this instep stitches and slide these on to the wire, emptying the right hand needle. -Place the CM on the right hand needle.
-Holding the right side of the heel flap in your left hand, pick up and knit the required number of stitches, leaving a wire loop at the CM and the EM.
-When you come to the end of the heel flap stitches, work across the stitches from the bottom of the heel and down the other side to the CM. (NOTE: It may be a bit awkward getting all of the heel stitches onto the working ends of the needle, but persist. Soon when the decreases begin it will become easier.)
-Work the gusset decreases as indicated placing the SSK or PSSO decreases after the CM and the K2tog decreases before the EM. Remember to knit a round between each set of decreases.
-Work the foot as with the leg, to the desired length.
Toe shaping
-Decrease as given in your pattern placing the SSK or PSSO decreases at the beginning of each of the needles and the K2tog decreases at the end of each of the needles.
Bind off or graft the toe as you would normally do, sliding both sets of stitches to the tips of the working needles.
THE MAGIC SECRET TO AVOID "LADDERS" WHERE THE NEEDLES MEET:
For those of you who have persisted to the end of this post, your patience and persistence will be rewarded as I share the secret of eliminating those nasty "ladders" that sometimes show up when you join your needles, whether in 3 needle knitting or circular knitting. The whole trick is to give a gentle but firm tug on the SECOND stitch of each needle - not the 1st one, which ironically and irritatingly seems to worsen the problem. Try it! It really works well.

28.5.08

FRINGED SHAWL OF RIBBON YARN

MATERIALS: -3 balls (400m without fringe, 450m with fringe) of Elba ribbon yarn (or other shiny fine tape type yarn).
8mm needles.

DIRECTIONS: Cast on 2 sts.
Row 1: K1, Yfwd, Knit to the end.
Repeat this row until the 1st ball is finished.
Next row: K1, Yfwd, Knit to the last 3 sts, increase in the next stitch, K2.
Repeat this row until there are approximately 180 sts. Cast off very loosely.

Fringes: Cut approximately 35 pieces of yarn 36 inches long.
Fold each piece in 2 then fold in half and pull through the first Yfwd space and loop over to make a tassel of 1 loop and 2 ends.
Repeat for each tassel, spacing them evenly up the outside edges of the shawl in every 2nd Yfwd space, leaving 24 inches at each end of the shawl free of tassels (for tying).

Note: When joining another ball of yarn, tie the ends together, leaving 6 inch tails. When the shawl is finished, sew the tails through the fabric of the shawl and secure with a few stitches of sewing thread if desired.

30.4.08

Pocket Purse

SIZE: 5" x 8"

MATERIALS: 2- 50g balls of Lang MALIBU
or 250m of any firm Worsted Weight yarn
One pair of size 3.75mm needles.
2- 3.25mm double pointed needles.
1 button.
DIRECTIONS:
1. Using 2 strands of the yarn held together, cast on 26 sts.
2. K 3 rows
3. Beginning and ending with a Purl row, continue in stocking st (K1 row, P1 row) until work measures 7 inches from the beginning.
4. Next row: Purl. (fold line)
5. Beginning with a purl row, continue in stocking st until work measures 7 ½ inches from the fold line, ending with a right side row.

Flap:
Row 1: (Wrong side) Knit
Row 2:K2, Sl 1, K1, PSSO, K to last 4 sts, K2tog, K2. (24sts)
Row 3: Purl.
Row 4: as Row 2.
Row 5: P2, K to last 2 sts, P2.
Repeat Rows 2 to 5 twice more (14sts).
Row 14: as Row 2 (12 sts)
Row 15: Purl
K 3 more rows.
Row 19: K5, cast off 2 sts, K to the end.
Row 20: K5, cast on 2 sts, K to the end.
K 2 more rows. Cast off. Fold in half at fold line and sew up sides. Place a button and attach to purse.

I-Cord
1. Using the 2 double pointed needles and a single strand of yarn, cast on 5 sts. Knit 1 row. DO NOT TURN.
2. *Slide these 5 sts to the other end of the needle and knit them again, gently pulling down on the cord and tugging yarn at the beginning of each row.
3. Repeat from * until cord is desired length or yarn is almost all gone. Beginning at the fold line of bag, sew each end of the cord to the side seams of bag.

30.3.08

GLORIOUS MITTENS


So, I'm not wanting to proclaim that this is the best mitten pattern in the world, because it isn't. But it is one of the nicest pairs of mittens that I've ever made and worn because of the yarn that is used: MANOS del URUGUAY, SILK BLEND DK.

To cater to the beauty and wonderful texture of this yarn, I knew that I wouldn't be wearing them to shovel snow or make snowballs; these were going to be "dressy" mittens. For this reason they are made quite small, to fit a lady's hand. Feel free to increase the needle size to 4mm if you wish to accomodate a man's size but I liked the firm texture and look that the 3.5mm gave me.

Needless to say, you can use any good quality Double Knitting weight yarn, but a good blend of pure wool and any other glorious fiber will make these mittens live up to their name: GLORIOUS MITTENS.
Level of Difficulty: This is a very easy pattern, designed as a first mitten pattern for all knitters. For this reason, the right and left mittens are identical. For those who like a more specific fit to cater to the physiological discrepancies between the left and right hand, see Note at the end of the pattern.
SIZE: To fit an average lady's hand.
MATERIALS: -2 x 50g skeins of MANOS del URUGUAY SILK BLEND DK (150m/50g)
3.5mm needles-
TENSION: 26sts = 4” in St st on 3.5mm needles.

DIRECTIONS:
Cuff: Cast on 46 sts.
Row 1 *K2, P2. Repeat from * to last 2 sts. K2.
Row 2: *P2, K2. Repeat from * to last 2 stts. P2.
Repeat these 2 rows until the cuff measures at least 2 1/2". (You will have enough yarn with 300m to make the cuffs long enough to turn back: 6-7")
Beginning with a K row, work 3 rows in stocking stitch (K 1 row, P 1 row)
Next row: P22, Increase in next stitch, P to end of row. (47 sts)
Thumb gussett:
Row 1: K22. Place a marker on the needle. Inc in next stitch. K1. Inc in next stitch. Place a 2nd marker on needle. K22. (49sts)
Row 2 and all wrong side rows: Purl, slipping markers in place.
Row 3 (increase row): K to first marker. Inc 1 st in stitch after the marker. K to the last st before the 2nd marker and inc in this st. K to the end of the row.
Repeat rows 2 & 3 until there are 9 sts between the markers. (53 sts)
Next row: Purl.
Next row: Knit.
Next row: Purl.
Next row: Repeat increase row (Row 3, above). (55 sts)
Repeat these last 4 rows until there are 19 sts between the markers. (63 sts)
Next row: (thumb opening) P23 sts, removing the 2nd marker as you pass it. Slip the next 17 sts onto a stitch holder. Inc 1 st in the next st and purl across the rest of the row. (47 sts)
Continue in St St until mitt measures approximately 6 1/2" from the top of the ribbing. (Try it on. Decreases usually begin at the top of the little finger.)
Top decreases:
1st dec. row: K2, *K2tog, K9. Repeat from * to last 3 sts. K3. (43 sts)
Next and all wrong side rows: Purl.
Next dec. row: K2, *K2tog, K8. Repeat from * to last 3 sts. K3. (39 sts)
Next dec. row: K2, *K2tog, K7. Repeat from * to last 3 sts. K3 (35 sts)
Continue decreasing in this manner on every right side row, having 1 less stitch between K2tog until there are 11 sts left on the needle. Cut yarn at about 18". Leave the remaining 11 sts on a stitch holder.
Thumb:
Put the 17 thumb sts from the stitch holder onto a needle and attach the yarn to the first stitch on the right side. Beginning with right side facing, work in stocking st. for approximately 16 rows (Your last row will be a purl row).
1st dec row: K1, *K2tog, K2. Repeat from * to end. (13 sts)
Next and all wrong side rows: Purl.
Next dec. row: K1, *K2tog, K1. Repeat from * to end. (9 sts)
Next dec. row: K1, *K2tog. Repeat from * to end. (5 sts)
Cut yarn leaving a 10" tail and thread it onto a tapestry/sewing needle. Slide the 5 remaining stitches onto the needle and draw up tightly. Sew thumb seam attaching securely at base of thumb to the 1 cast on stitch.
Finishing: Thread the tail from the top of the mitten through a tapestry/sewing needle and slide through all the stitches on the stitch holder drawing them up tightly. Continue to sew the side seam of the mitten.
Make a 2nd mitten to match the first.
NOTE : Because the thumb is not exactly midway across the hand, you may wish to make a slight alteration in the pattern by knitting across 24 sts at the beginning of the right mitten before placing the marker for the thumb gusset. This will leave you with 20 sts after the 2nd marker.
For the left mitten, you will knit 20 sts before placing the marker at the thumb gusset, leaving you with 24 sts after the 2nd marker.

1.2.08


FASHION SCARVES FOR THE COMPLETELY
UN-CRAFTY
I was recently given the challenge of finding a pattern for something stylish to bring to a group of 10 professional women with an extreme discrepancy in their crafting abilities. Furthermore, the project needed to be a pattern that would appeal to everyone's sense of beauty, and it must be achievable in less than an hour with a glass of wine at the crafter's elbow while chatting with those around them. Some were accomplished knitters and crocheters while others had never touched a ball of yarn in their lives. This pattern fit the bill perfectly. It is guaranteed to be achievable by anyone who can tie a knot and has passed the scissors unit in Kindergarten. Try it at a little girls birthday party!
The results were so beautiful that many of the women were wearing their stunning scarves at breakfast the next morning.
Size: Directions are given for a small "scarf" that goes around the neck once and ties mid chest with tails hanging down (shown above at left). In brackets are quantities required to make the "double scarf" version which is worn doubled around itself with the knot hidden in the back of the neck.
Materials: This is the perfect stash busting project...
3-5m each of at least 5 different fashion yarns. Or as many as you want.
(6-10m each for the "double scarf")
- a very large crochet hook. (optional)
Directions: For those of you who understand crafty terms:
-Cut the lengths of yarn to make the desired size of scarf.
-Hold the ends firmly together and make a slip knot about 6" from one end.
-Using fingers or a large crochet hook, work a series of chain stitches making sure to catch each of the strands on each stitch. Assure a similar tension for each of the stitches.
-Continue until there is about 10" of strands left. Pull all strands through and pull to secure.
-Holding both sets of fringes together, tie them into a secure overhand knot and let them hang down for the simple "scarf" version; or trim close to the knot for the "double scarf" shown on right above. Alternately, make a reef knot (right over left and under; left over right and under) about 6"along the chain and let ends and fringe hang.
Directions: For the un-crafty.
-Cut lengths of yarn as specified under materials for the scarf you wish to make.
-Holding the ends firmly together, fold the group of strands over at about 12 inches from one end and tie a secure loop that is just big enough for your thumb and first 2 fingers to squeeze through.
-Holding the short tail of your scarf in your left hand, gently slip the thumb and first 2 fingers of the right hand through the loop and grasp the long tail of the yarns between them and pull ALL strands through the loop until you have created another loop about the same size as the first one. (This is called making a chain, and not to scare un-crafty among you...you are crocheting.)
-Repeat this action of squeezing your fingers through the last loop and grasping the yarns, pulling them through and creating another loop the same size as the previous one until there is about 10" of strands left.
-On the last pull-through, do not create a loop but keep pulling all of the strands through to their ends and pull tightly.
-Hold the fringe from both ends of the scarf and loop around to tie into a firm single knot and trim ends to 6" for the shorter version as shown on left above, or trim the fringe close to the knot for the "double scarf" version. You could also use a reef knot (right over left and under; left over right and under) about 6 inches along the "chain", above the fringes to create another nice effect.